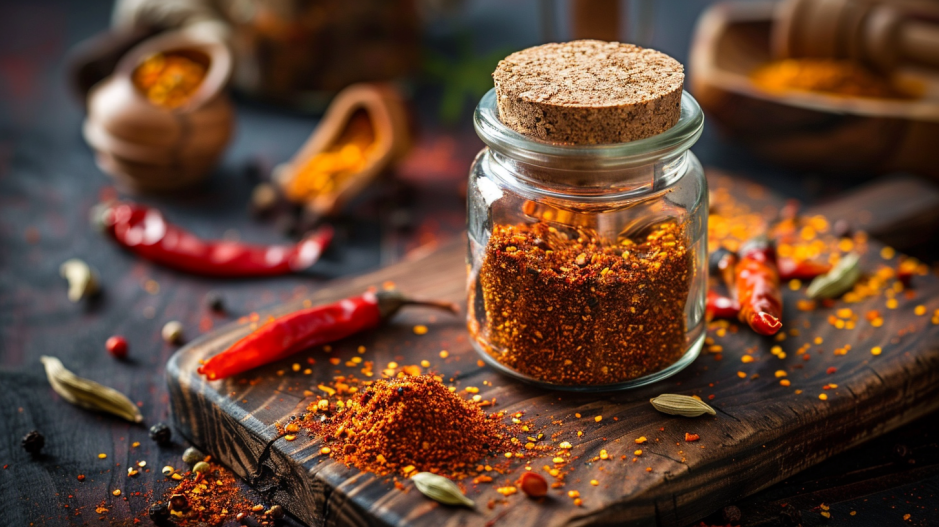
There’s something magical about the aroma of chili simmering on a cold Sunday afternoon the warm, earthy spices filling your kitchen, promising comfort in every spoonful. But here’s the truth most home cooks discover too late: those convenient seasoning packets at the store are loaded with anti-caking agents, excessive sodium, and fillers you can’t even pronounce. They’re also charging you a premium for what amounts to pennies worth of basic spices. Creating your own Chili Seasoning Recipe can change everything.
What if I told you that crafting your own chili seasoning blend takes less than 5 minutes and costs a fraction of store-bought packets? Even better you’ll learn to create five different versions tailored to your exact taste preferences, from mild and family-friendly to smoky and intense. The secret that separates amateur blends from restaurant-quality seasoning? A simple toasting technique that unlocks aromatic compounds most recipes completely ignore.
Whether you’re preparing a classic pot of chili, seasoning your creamy white chicken chili, or looking to elevate your chicken enchiladas, this guide will transform how you approach seasoning blends forever.
White Chicken Chili Recipe Without Corn.
Table of Contents
Why Make Your Own Chili Seasoning?
The Science Behind the Spices
Understanding why certain spices work together isn’t just culinary geekery it’s the key to creating balanced, restaurant-quality blends. The magic of chili seasoning lies in the chemical synergy between cumin and chili powder. Cumin contains aldehyde compounds that create earthy, warm notes, while capsaicin in chili peppers triggers heat receptors on your tongue. When combined with paprika’s fruity undertones and garlic’s sulfur compounds, you create layers of flavor that hit different taste receptors simultaneously.
This is also where the Maillard reaction comes into play. When you toast your spices (we’ll cover this technique later), you’re triggering a chemical reaction between amino acids and reducing sugars that creates hundreds of new flavor compounds. According to USDA research on spices, this process significantly intensifies aromatic complexity something pre-made packets simply can’t replicate after sitting on shelves for months.
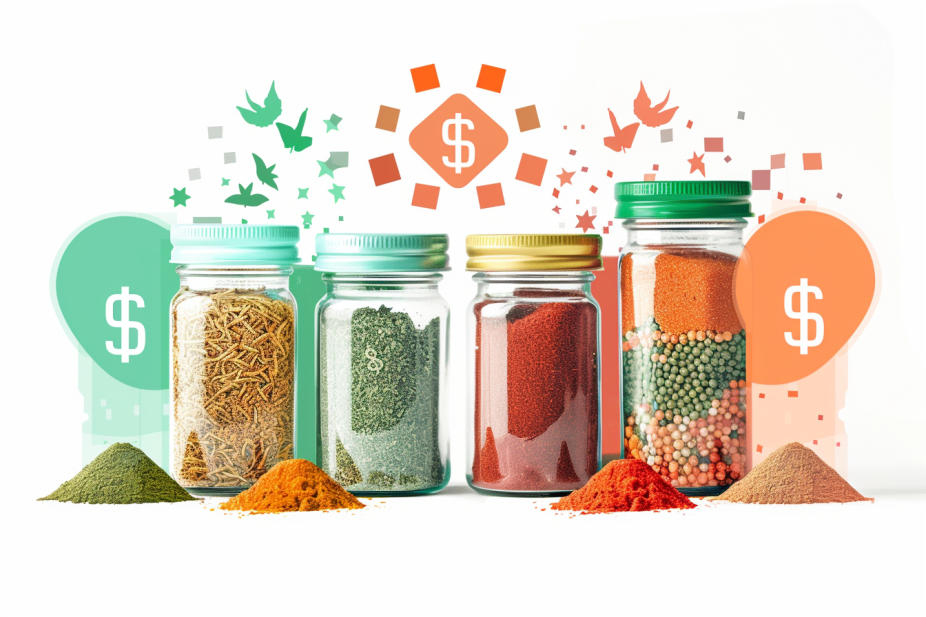
Cost Comparison: Homemade vs. Store-Bought
Let’s talk economics. A standard 1-ounce seasoning packet costs between $1.50-$3.00 and typically contains enough for one pound of meat. If you make chili twice a month, that’s $36-$72 annually just on seasoning packets.
Making your own blend costs approximately $0.40-$0.60 per batch using quality bulk spices. That same annual usage? Just $9.60-$14.40. You’re saving 75-80% while getting fresher, more potent spices without additives. The initial investment in bulk spices pays for itself after just 3-4 batches.
Homemade Chili Seasoning
Create your own chili seasoning blend in less than 5 minutes with this easy recipe. Customize for your taste with five variations.
- Prep Time: 5 minutes
- Cook Time: 0 minutes
- Total Time: 5 minutes
- Yield: About ¾ cup (enough for 4-5 pounds of meat)
- Category: Condiment
- Method: Mixing
- Cuisine: American
- Diet: Vegan
Ingredients
- 3 tablespoons chili powder
- 2 tablespoons ground cumin
- 1 tablespoon paprika (sweet or smoked)
- 1 tablespoon garlic powder
- 1 tablespoon onion powder
- 1 teaspoon cayenne pepper (adjust to taste)
- 1 teaspoon dried oregano
- 1 teaspoon black pepper
- 1 teaspoon sea salt (optional, add to taste when cooking)
Instructions
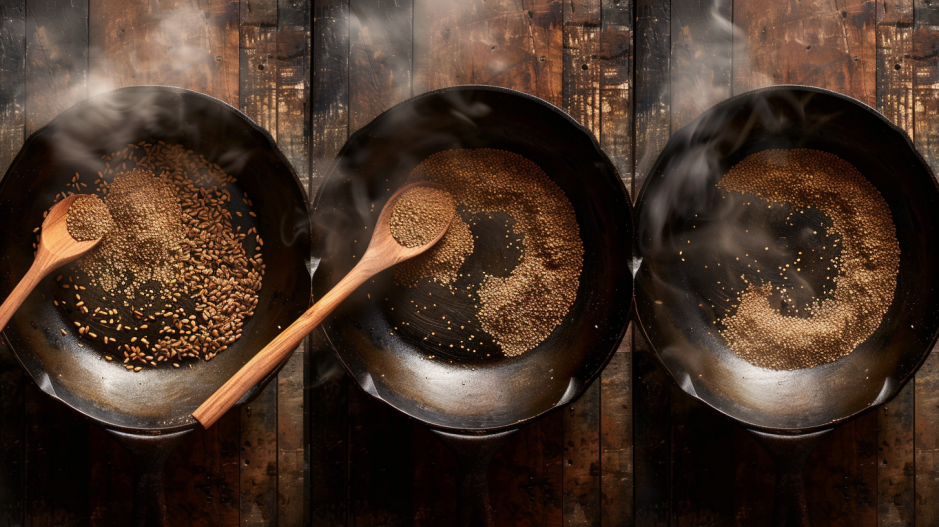
- Toast Your Spices: Heat a dry skillet over medium-low heat. Add cumin and toast for 1-2 minutes, stirring constantly, until fragrant. Let cool.
- Combine and Mix: In a small bowl, whisk all ingredients until thoroughly combined. For a smooth texture, pulse in a spice grinder for 5-10 seconds.
- Taste Test: Take a tiny pinch and adjust seasoning as needed.
- Store Properly: Transfer to an airtight container, preferably glass and opaque, and label with the date.
Notes
Use 3 tablespoons per 1 pound of meat. Adjust amount for slow cooker recipes.
Nutrition
- Serving Size: 1 tablespoon
- Calories: 25
- Sugar: 0g
- Sodium: 500mg
- Fat: 1g
- Saturated Fat: 0g
- Unsaturated Fat: 1g
- Trans Fat: 0g
- Carbohydrates: 5g
- Fiber: 2g
- Protein: 1g
- Cholesterol: 0mg
The Classic Chili Seasoning Recipe
This Chili Seasoning Recipe serves as the cornerstone of countless dishes, enhancing flavors and providing the perfect kick to your meals.
This is your foundation a perfectly balanced blend that works for traditional beef chili, turkey chili, or even vegetarian versions. Once you master this base recipe, you’ll easily adapt it to the regional variations below.
Ingredients
- 3 tablespoons chili powder
- 2 tablespoons ground cumin
- 1 tablespoon paprika (sweet or smoked)
- 1 tablespoon garlic powder
- 1 tablespoon onion powder
- 1 teaspoon cayenne pepper (adjust to taste)
- 1 teaspoon dried oregano
- 1 teaspoon black pepper
- 1 teaspoon sea salt (optional add to taste when cooking)
Yield: About ¾ cup (enough for 4-5 pounds of meat)
Instructions
Step 1: Toast Your Spices (Optional but Recommended)
Heat a dry skillet over medium-low heat. Add cumin and toast for 1-2 minutes, stirring constantly, until fragrant and slightly darkened. This step releases essential oils and deepens flavor significantly. Let cool before mixing with other spices.
Step 2: Combine and Mix
In a small bowl, whisk all ingredients together until thoroughly combined. For the smoothest texture, you can pulse the mixture in a spice grinder for 5-10 seconds (this also helps if your oregano is in larger flakes).
Step 3: Taste Test
Take a tiny pinch and taste it. The blend should be earthy with moderate heat. If it’s too spicy, add more paprika. Too mild? Increase cayenne by ¼ teaspoon increments.
Step 4: Store Properly
Transfer to an airtight container, preferably glass and opaque to protect from light. Label with the date.
Usage: Use 3 tablespoons per 1 pound of meat. For slow cooker recipes, you may want to add an extra tablespoon as flavors mellow during long cooking times.
5 Regional Variations to Try
The beauty of making your own blend is customization. Here are five authentic regional styles that showcase the diversity of American chili traditions.
Texas-Style (Beef-Forward & Bold)
Texas chili often called “bowl of red” is all about beef and bold, pure chile flavor. This version skips beans entirely and doubles down on chili powder.
Modifications to base recipe:
- Increase chili powder to 4 tablespoons
- Reduce cumin to 1 tablespoon
- Add 1 teaspoon finely ground coffee
- Add ½ teaspoon cocoa powder
The coffee and cocoa add depth and enhance the meat’s umami without being detectable as individual flavors.
Cincinnati-Style (Sweet & Aromatic)
Cincinnati chili is unlike any other served over spaghetti with a unique sweet-spice profile that includes warm baking spices.
Modifications to base recipe:
- Add 1 teaspoon ground cinnamon
- Add ½ teaspoon ground allspice
- Add ¼ teaspoon ground cloves
- Add 1 teaspoon unsweetened cocoa powder
- Reduce cayenne to ½ teaspoon
New Mexico Green Chili
This version celebrates the state’s famous Hatch chiles with a brighter, greener flavor profile.
Modifications to base recipe:
- Replace regular chili powder with 3 tablespoons Hatch chile powder
- Toast whole cumin seeds before grinding
- Add 1 teaspoon dried cilantro
- Add ½ teaspoon Mexican oregano (instead of regular)
White Chicken Chili Blend
Perfect for lighter, cream-based chicken chilis, this blend trades red pepper heat for bright, herbaceous notes. Use this with any of our white chicken chili recipes.
Different base entirely:
- 2 tablespoons ground cumin
- 1 tablespoon garlic powder
- 1 tablespoon onion powder
- 2 teaspoons dried oregano
- 1 teaspoon ground coriander
- ½ teaspoon white pepper
- 1 teaspoon dried lime zest (or ½ teaspoon citric acid)
- ½ teaspoon cayenne pepper
Vegan/Bean Chili Blend
When meat isn’t the star, you need bolder, smokier flavors to create depth and satisfy.
Modifications to base recipe:
- Use smoked paprika instead of sweet
- Add 1 teaspoon smoked cumin (or toast regular cumin heavily)
- Add 1 teaspoon nutritional yeast for umami
- Add ½ teaspoon chipotle powder
- Increase oregano to 1½ teaspoons

The Customization Guide: Dial In Your Perfect Heat Level
Not everyone has the same spice tolerance. Use this chart to adjust the base recipe to your preference:
| Heat Preference | Adjustments | Best For |
|---|---|---|
| Mild | Reduce cayenne to ¼ tsp, increase sweet paprika by 1 tbsp | Kids, spice-sensitive eaters |
| Medium | Use recipe as written | Most adults, balanced flavor |
| Hot | Increase cayenne to 2 tsp, add ½ tsp chipotle powder | Heat lovers, bold palates |
| Smoky | Use smoked paprika, add 1 tsp chipotle, ½ tsp liquid smoke | BBQ-style, outdoor cooking |
| Earthy | Increase cumin to 3 tbsp, add 1 tsp coriander | Traditional, rustic chilis |
Secret Ingredients Professional Chefs Add
Want to take your blend from good to extraordinary? Try these chef-approved additions:
- Cocoa Powder (1 tsp): Adds depth and richness without chocolate flavor
- Ground Cinnamon (½ tsp): Creates warmth and rounds out heat
- Instant Coffee Grounds (1 tsp): Amplifies umami and beef flavor
- Brown Sugar (1 tsp): Balances acidity and heat, creates caramelization
- Ground Coriander (1 tsp): Adds citrusy, floral notes that brighten the blend
Storage and Shelf Life
Optimal Storage Method
Proper storage is critical for maintaining potency. Spices don’t spoil in a food safety sense, but they lose volatile oils that give them flavor.
Best practices:
- Container: Use opaque glass jars with airtight lids. Light degrades spices quickly, so amber or dark glass is ideal. Avoid plastic it’s porous and allows essential oils to escape.
- Location: Store in a cool, dark cabinet away from the stove. Heat accelerates flavor loss. Avoid the cabinet directly above your cooktop.
- Moisture: Never use a damp spoon in your blend. Even small amounts of moisture cause clumping and can introduce mold.
- Labeling: Always write the date you mixed the blend on the jar
How Long Does It Last?
- Optimal flavor: 3-6 months
- Acceptable quality: Up to 12 months
- Past 12 months: Still safe but significantly diminished flavor better to make a fresh batch
Freshness Test
Not sure if your blend is still good? Rub a small pinch between your fingers and smell it deeply. Fresh spices should have a strong, immediate aroma. If you barely smell anything, it’s time for a new batch.
Beyond Chili: Creative Uses for Your Seasoning Blend
Made a big batch and wondering what else you can do with it? This seasoning is incredibly versatile:
- Dry Rub for Grilled Meats: Pat it onto chicken thighs, pork chops, or tri-tip before grilling. Try it on our baked chicken thighs for a flavor upgrade.
- Roasted Vegetables: Toss butternut squash, cauliflower, or Brussels sprouts with olive oil and 1-2 tablespoons of seasoning before roasting at 425°F.
- Popcorn Upgrade: Mix with melted butter and drizzle over freshly popped popcorn for movie night.
- Dips and Spreads: Stir into sour cream, Greek yogurt, or cream cheese for an instant savory dip. Also great mixed into guacamole or hummus.
- Taco Bowls & Burrito Seasonings: Use it to season ground beef or turkey for tacos. Works perfectly in our sweet potato taco bowl.
- Enchilada Filling: Season your protein before rolling into enchiladas. Pairs beautifully with our 30-minute chicken enchiladas.
- Breakfast Upgrade: Sprinkle into scrambled eggs or add to our high-protein breakfast burrito filling.
- Homemade BBQ Sauce Base: Use 2 tablespoons as the spice foundation for tomato-based BBQ sauce.
Troubleshooting Common Problems
Even experienced cooks run into issues. Here’s how to fix the most common seasoning blend problems:
Problem: My Chili Tastes Too Spicy
Solution: Don’t panic it’s fixable. Add 2 tablespoons of sweet paprika and 1 teaspoon of brown sugar to your pot. The sugar helps balance capsaicin’s heat, while paprika dilutes the concentration without changing the flavor profile drastically. You can also add a dollop of sour cream when serving.
Problem: The Blend is Too Salty
Solution: This is why I recommend making salt-free blends and adding salt to taste while cooking. If your blend is already mixed with salt, dilute it by adding equal parts chili powder, cumin, and paprika to reduce the salt concentration.
Problem: Lacking Depth or Tastes One-Dimensional
Solution: This usually means your spices weren’t toasted or they’re stale. Toast a tablespoon of cumin seeds in a dry pan until fragrant, then grind and add to your next batch. Also try adding ½ teaspoon of cocoa powder or instant coffee to create umami depth.
Problem: Bitter Aftertaste
Solution: Bitterness often comes from old garlic powder or over-toasted spices. Replace your garlic powder and make sure you’re toasting over medium-low heat, not high heat. Burned spices turn bitter quickly.
Problem: Grainy or Clumpy Texture
Solution: Moisture has gotten into your blend. First, spread it on a baking sheet and let it air dry for 2 hours. Then pulse in a spice grinder or food processor to break up clumps. Going forward, always use a dry spoon and keep the lid tightly sealed.
Frequently Asked Questions
What’s the difference between chili powder and cayenne pepper?
This is probably the most common confusion. Chili powder is a blend typically containing ground dried chilies, cumin, garlic powder, and oregano. Cayenne pepper is a single-ingredient spice made from ground cayenne peppers and is significantly hotter. You can’t substitute one for the other in equal amounts.
Can I use this instead of taco seasoning?
They’re very similar! Chili seasoning tends to be slightly earthier and less cumin-forward than taco seasoning. You can absolutely use this for tacos just consider adding an extra teaspoon of cumin and a pinch of smoked paprika for that classic taco flavor.
How much should I use in a slow cooker?
For slow cooker chili, use 3-4 tablespoons per 2 pounds of meat. The long cooking time allows flavors to mellow, so you want to start with slightly more seasoning than you would for stovetop cooking. Always taste 30 minutes before serving and adjust if needed.
Is homemade chili seasoning compatible with special diets?
Yes! This blend is naturally gluten-free, vegan, paleo, keto, and Whole30 compliant when you omit the optional salt or use a compliant salt. Always check individual spice labels to ensure they haven’t been processed in facilities with cross-contamination if you have severe allergies.
Do I really need to toast the spices?
It’s optional, but I highly recommend it. Toasting whole cumin seeds (or even pre-ground cumin for 30 seconds) activates essential oils and creates hundreds of new flavor compounds through the Maillard reaction. The difference is noticeable toasted spices have a deeper, more complex flavor. That said, if you’re short on time, untoasted is still miles better than store-bought packets.
Final Thoughts: Make It Your Own
The beauty of homemade chili seasoning isn’t just about saving money or avoiding additives it’s about taking control of your flavor profile and creating something uniquely yours. Some of my best cooking memories involve tweaking spice ratios until I landed on “the perfect blend” for my family.
Start with the classic base recipe and experiment from there. Maybe you prefer a smokier profile, or perhaps your family loves heat. The five regional variations give you a roadmap, but the real magic happens when you start making small adjustments based on your palate.
Keep notes on what you try I use a small notebook in my spice cabinet. Jot down modifications like “added extra ½ tsp cinnamon – loved it” or “too much cayenne for kids.” Over time, you’ll develop your signature blend that friends and family will request recipe cards for.
One final tip: make this in larger batches. The recipe I’ve provided makes about ¾ cup, but you can easily double or triple it. Homemade seasoning makes thoughtful gifts package it in small mason jars with a handwritten label and recipe card. It’s an inexpensive, personal gift that actually gets used.
Now it’s your turn. Mix up a batch this weekend, make a pot of chili, and taste the difference that fresh, homemade seasoning makes. Once you experience the depth of flavor, you’ll never go back to store-bought packets again.
Have you tried making your own chili seasoning? What’s your secret ingredient? Drop a comment below I’d love to hear about your experiments and favorite variations!
Pin this recipe for later and share it with your fellow chili lovers!