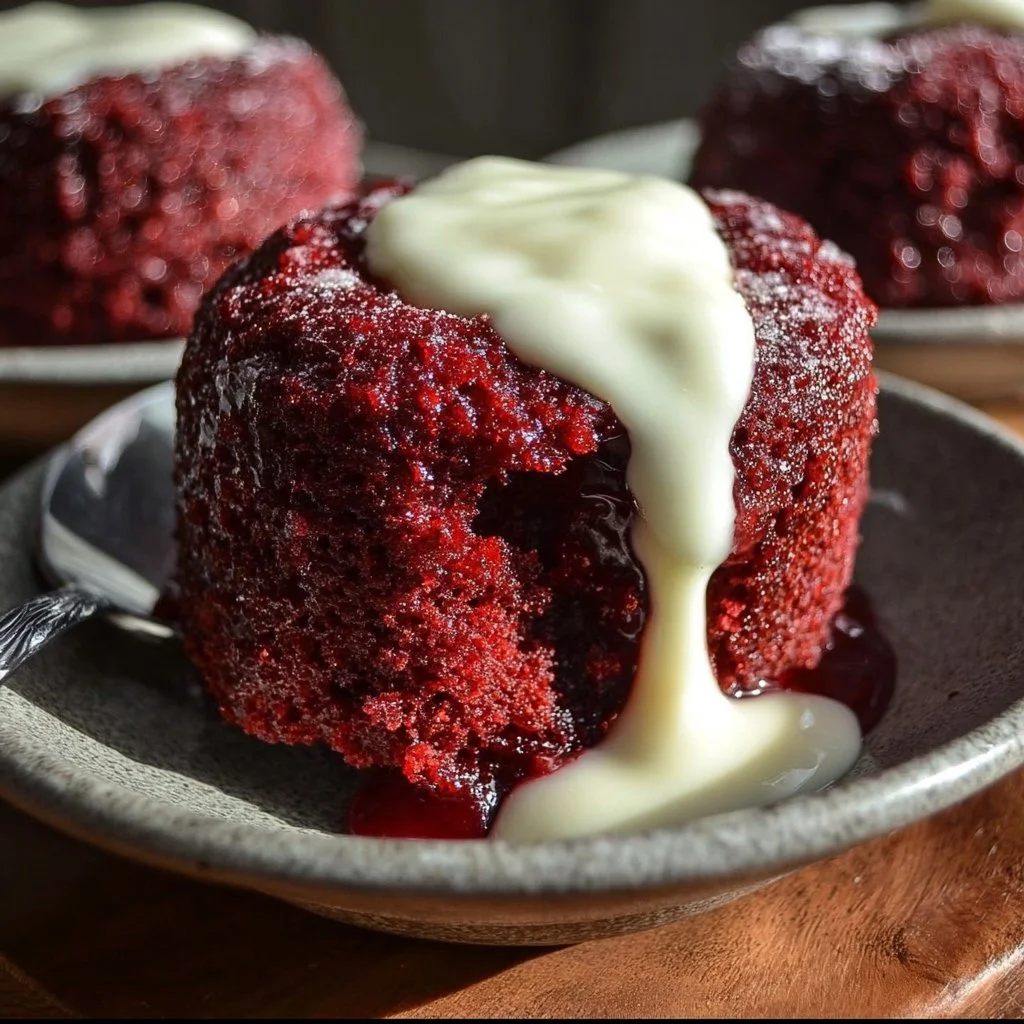

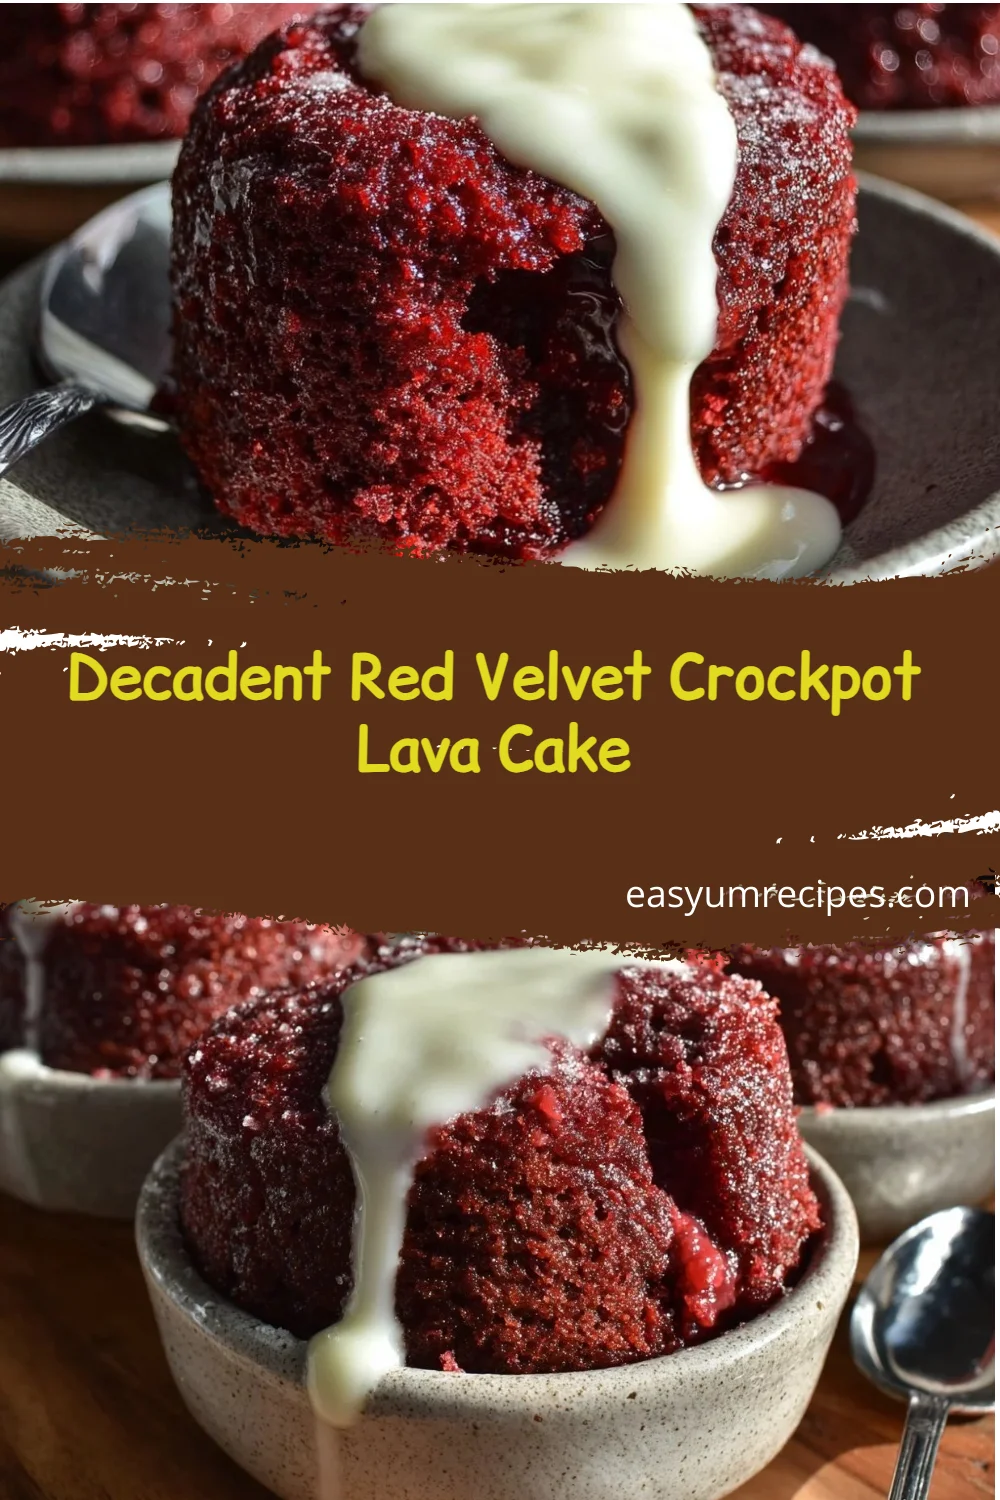
Red Velvet Crockpot Lava Cake is a game-changing dessert for busy hosts, and it steals attention on Pinterest and Facebook. Does slow-cooking a molten cake sound impossible? This Red Velvet Crockpot Lava Cake recipe proves otherwise, delivering a gooey center and silky cream cheese glaze every time.
This guide is better because it blends precise crockpot timing, actionable troubleshooting, and creative variations that top food blogs miss. If you want more decadent dessert ideas, see our best comfort meal and dessert pairing tips for easy planning.
In this guide, you’ll learn how to build, bake, and finish a show-stopping Red Velvet Crockpot Lava Cake, with exact steps, substitutions, storage tips, and related recipes to try next.
What Is Red Velvet Crockpot Lava Cake?
Red Velvet Crockpot Lava Cake is a slow-cooked chocolate-tinged cake with a molten, custardy center and a tangy cream cheese glaze. It borrows classic red velvet flavor, then uses the crockpot to maintain a soft, gooey interior, perfect for feeding a crowd.
This version shines for potlucks and holiday dinners because the crockpot keeps texture consistent, and the glaze stays pourable. For dinner pairing ideas that balance richness, consider serving with lighter mains and salads like those in our dinner planning suggestions.
Quick Facts about Red Velvet Crockpot Lava Cake
- Yield, serves 6 to 8
- Cook time, 2 hours on low (start checking at 105 minutes)
- Approx. calories, 380 kcal per serving (glaze included)
- Main allergens, wheat, dairy, egg
Nutritional highlights: per serving, 380 kcal, 18 g fat, 45 g carbs, 5 g protein. Adjust sweetness and portion for lower kcal.
Did you know? Red velvet was popularized in early 20th century American baking, prized for its tender crumb and cocoa flavor.

Red Velvet Crockpot Lava Cake
Ingredients
For the cake
- 1 cup all-purpose flour Can substitute with gluten-free flour.
- 1 cup granulated sugar Adjust for lower sugar options.
- 1/4 cup cocoa powder
- 2 tsp baking powder
- 1 tsp baking soda
- 1/2 tsp salt
- 1 cup buttermilk Can substitute with plant-based milk.
- 1/3 cup vegetable oil
- 1 large egg
- 1 tsp vanilla extract
- 1 tbsp red food coloring
- 1 tbsp white vinegar
For the cream cheese glaze
- 8 oz cream cheese, softened Substitute with vegan cream cheese for dairy-free option.
- 1 cup powdered sugar Adjust for lower sugar options.
- 2 tbsp milk Use plant-based milk for dairy-free version.
- 1 tsp vanilla extract
Instructions
Preparation
- Grease the inside of the crockpot thoroughly with butter or non-stick spray.
- In a large bowl, whisk together the flour, sugar, cocoa powder, baking powder, baking soda, and salt until evenly combined.
- In a separate bowl, mix the buttermilk, vegetable oil, egg, vanilla extract, red food coloring, and white vinegar until smooth and vibrant red.
- Slowly pour the wet mixture into the dry ingredients, folding gently with a spatula until just combined.
- Pour the batter evenly into the greased crockpot and smooth the top with a spatula.
Cooking
- Cover and cook on low heat for about 2 hours. Start checking at 1 hour 45 minutes by inserting a toothpick near the edges.
- While the cake cooks, beat the softened cream cheese until smooth. Add powdered sugar, milk, and vanilla extract and whisk until silky and pourable.
- Once the cake is done, carefully uncover and spoon the cream cheese glaze generously over the top.
- Serve immediately for best lava effect.
Notes
Nutrition
Step-by-Step Instructions
Follow these exact steps to achieve a molten center and set edges. Each step lists the action, plus the expected result so you can check doneness confidently.
- Grease the inside of the crockpot thoroughly with butter or non-stick spray.
Expected result, a thin glossy film that prevents sticking and helps even browning along edges. - In a large bowl, whisk together the flour, sugar, cocoa powder, baking powder, baking soda, and salt until evenly combined.
Expected result, dry mix without lumps and even cocoa distribution. - In a separate bowl, mix the buttermilk, vegetable oil, egg, vanilla extract, red food coloring, and white vinegar until smooth and vibrant red.
Expected result, bright red liquid base that emulsifies the oil and egg. - Slowly pour the wet mixture into the dry ingredients, folding gently with a spatula until just combined. Batter should be thick but pourable.
Expected result, thick batter with no streaks of flour, slightly ribboning from the spatula. - Pour the batter evenly into the greased crockpot and smooth the top with a spatula.
Expected result, level surface for uniform cooking. - Cover and cook on low heat for about 2 hours. Start checking at 1 hour 45 minutes by inserting a toothpick near the edges; the edges should be set and spring back lightly, while the center remains gooey.
Expected result, firm edges, slightly jiggly center, toothpick with moist crumbs but not raw batter. - While the cake cooks, beat the softened cream cheese until smooth. Add powdered sugar, milk, and vanilla extract and whisk until silky and pourable. Add more milk if needed.
Expected result, glossy cream cheese glaze that pours smoothly at room temperature. - Once the cake is done, carefully uncover and spoon the cream cheese glaze generously over the top. Garnish with fresh berries or nuts if desired.
Expected result, glaze puddling slightly into the center to accent the lava effect. - Serve immediately for best lava effect.
Expected result, warm molten center and a contrast of creamy glaze and tender crumb.
Variations & Substitutes
Swap ingredients to fit diets or to refresh flavor. Each variation affects texture, cook time, and nutrition, so choose based on priority: flavor, speed, or health.
- Gluten-free, use 1:1 gluten-free flour, same cook time but check earlier at 100 minutes.
- Dairy-free, substitute plant-based milk and vegan cream cheese; expect slightly less tang.
- Lower sugar, reduce sugar by 20%, glaze may need extra powdered sugar for thickness.
- Berry twist, fold 80 g chopped raspberries into batter for tart notes, add 5 minutes to cook time.
Chef tip, for a deeper cocoa note, swap 10 g of flour for 10 g espresso powder, it amplifies chocolate without bitterness.
Mistakes to Avoid
Beginner bakers often make predictable errors that flatten texture or ruin the lava center. Use this checklist to avoid them and to rescue the dessert if something goes wrong.
- Not greasing pot well, fix, reheat a thin layer of butter and recoat before pouring batter.
- Opening lid too often, fix, limit checks to a single toothpick test late in cook time.
- Overbeating batter, fix, fold only until combined to preserve lift and molten center.
- Using wrong crockpot size, fix, use 3.5 to 4.5 L pot for even depth and timing.
- Serving cold, fix, reheat 2 to 3 minutes on low or microwave single servings 20 to 30 seconds.
Storage, Reuse
Store leftovers in an airtight container in the refrigerator for up to 3 days, or freeze portions for up to 2 months. Reheat gently to preserve the lava texture.
- Refrigerate, 3 days, cover to prevent skin forming on glaze.
- Freeze, 2 months, wrap tightly and thaw overnight in fridge.
- Reheat, microwave 20 to 30 seconds per serving at 800 W or warm in a 150 C oven for 8 minutes.
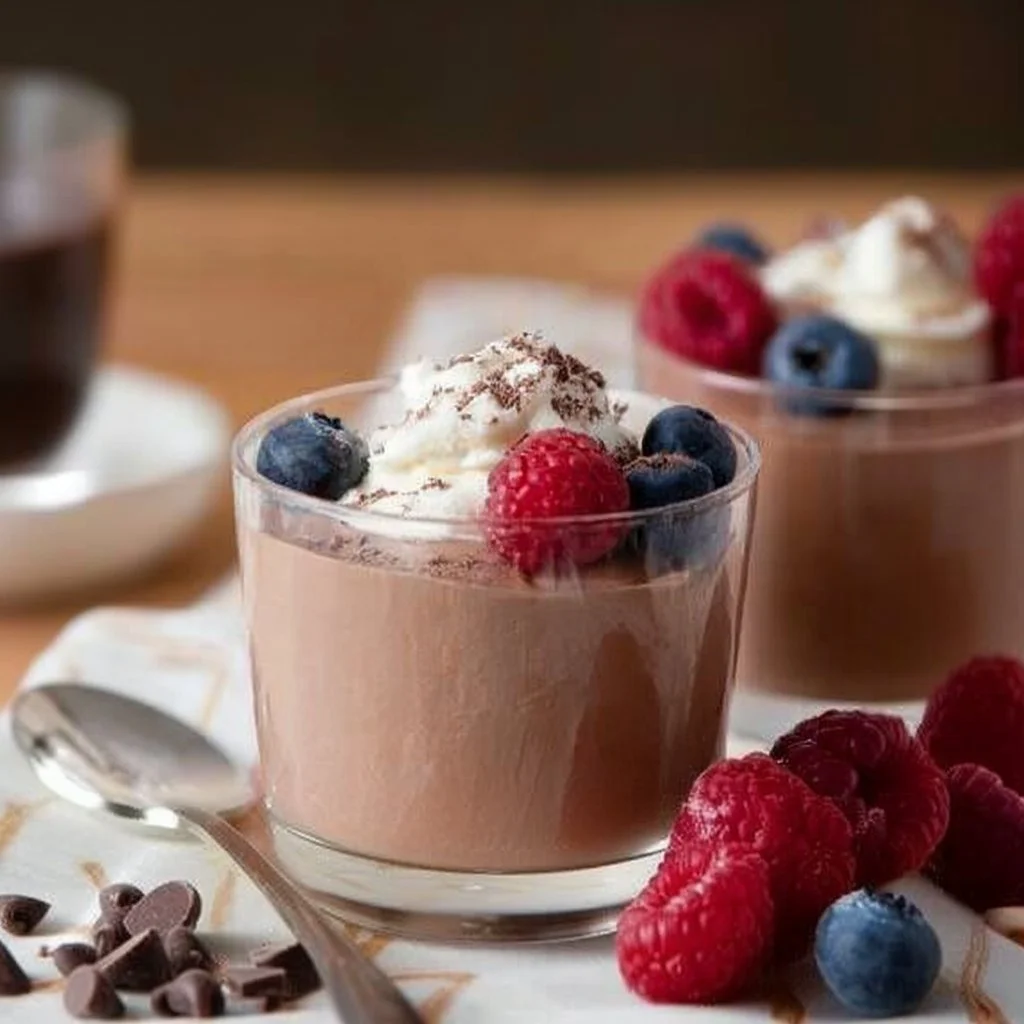
If you like dessert protein swaps, explore our cottage cheese dessert ideas like cheese chocolate mousse variations and low-sugar adaptations for meal prep.
Related Recipes / See Also
If you love this, try our other indulgent, easy desserts and snack recipes to round out a menu.
- If you love creamy dessert textures, try this cheese chocolate mousse with chia seeds.
- For a lighter protein-packed dessert, see our cottage cheese chocolate mousse.
- Craving cookie dough instead? Try the no-protein-powder version, cottage cheese cookie dough without protein powder.
Conclusion
Red Velvet Crockpot Lava Cake delivers dramatic presentation with minimal fuss. The crockpot method reduces hands-on time and improves consistency, while the cream cheese glaze ties classic flavor notes together. Make it for your next gathering and enjoy a reliably indulgent dessert.
Want to compare nutrition or ingredients? Check USDA guidance for portion sizes and allergen info at USDA.